I am currently doing the Practical Ethical Hacker course by Heath Adams (The Cybermentor).
In this course he uses the vulnerable Kioptrix Level 1 VM available on VulnHub. I set up my home-lab in a Proxmox VE. This allows me to do my Cybersec training separate from my home network. Here I can play around and test things without putting my home network at risk. If I mess things up in my home-lab I can just reload it without too much worries. I will do a series of posts on my setup later.
So wanting to use my home-lab and not just a VMware virtual machine, I started using the normal techniques of how to move a VMware virtual machine to Proxmox. I encountered a lot of problems, like Kernel panic and no network connection. After a long struggle, I finally managed to get it to boot and receive an IP address from my DHCP server.
Here I will explain step by step how to create the machine and ensure that it will configure the network in order to get an IP from the DHCP server:
Step 1 (Create your VM):
In the general tab, choose your node and name your VM.

In the OS tab, choose “Do not use any media” and for the Guest OS choose Linux 2.4 Kernel.

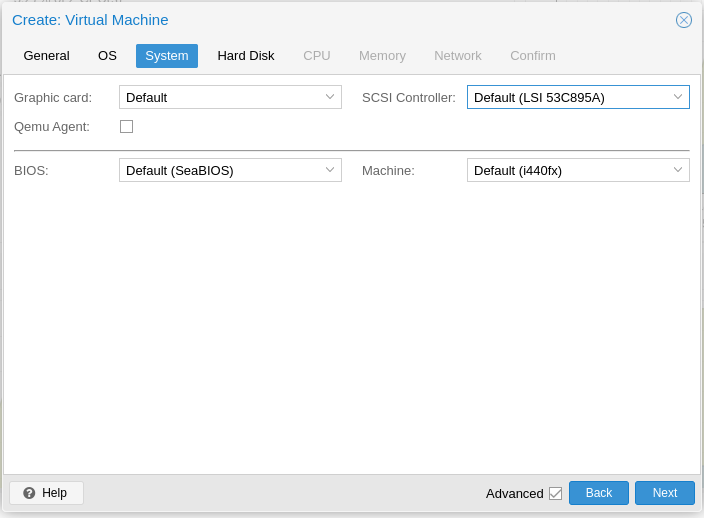
Check that your System tab match the following:
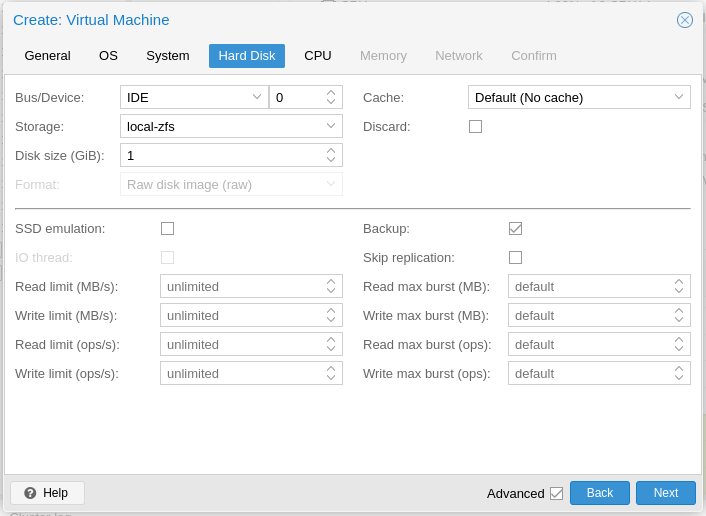
In the Hard Disk tab, make sure to choose “IDE”. The disk size does not matter as we will delete it later.
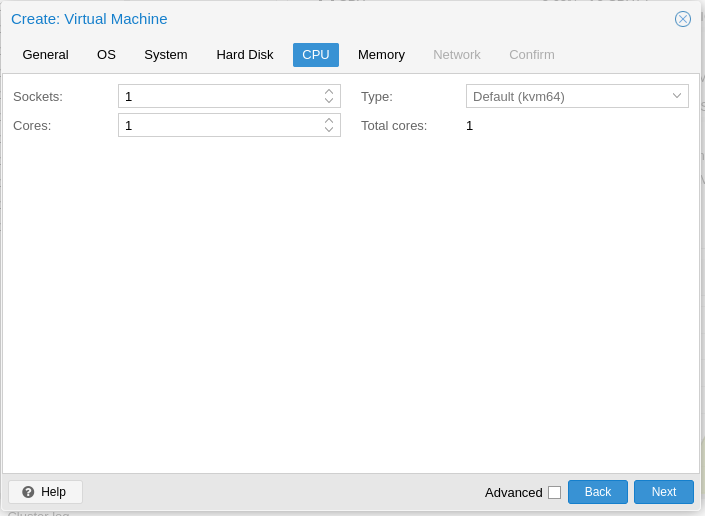
Under CPU tab, you can give the VM just one core. It is a very lightweight version of Linux, so it does not need a lot of processing power. The “kvm64” type worked fine for me.
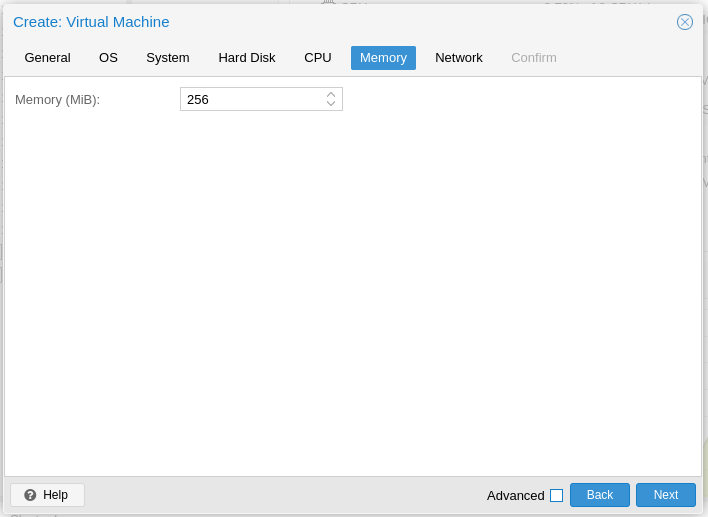
256MB Memory is enough for this machine.
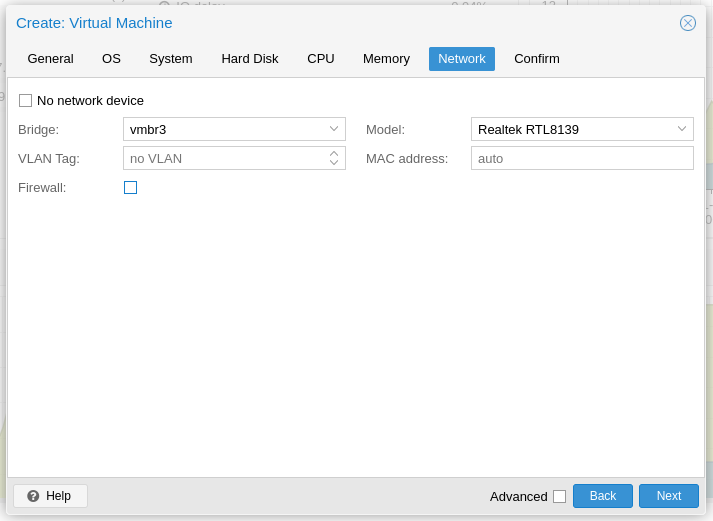
In the network tab, ensure that you choose your correct LAN bridge where your attack machine will be able to reach the VM. Also make sure to use the Realtek RTL8139 device, this was the only one that worked for me.
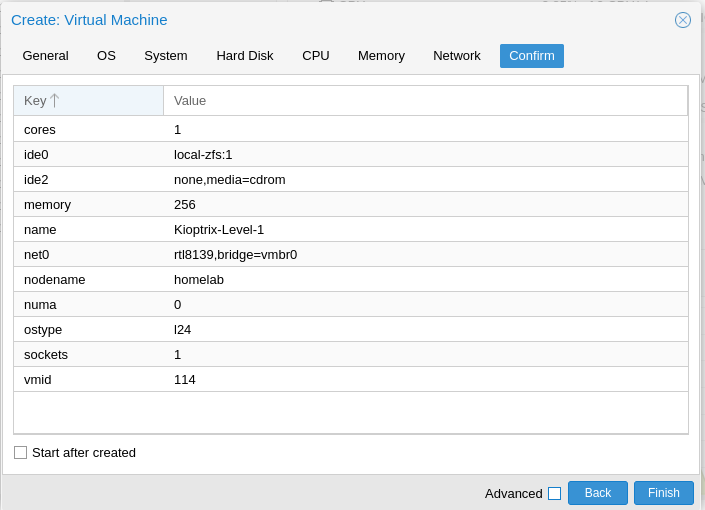
Confirm the settings. Your settings will differ here, that won’t be a problem if you followed the other settings as explained above.
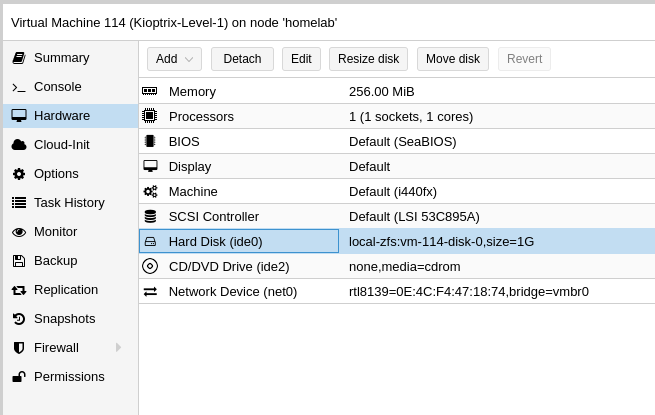
Step 2 (Remove HDD):
Under Hardware, click on the Hard Disk and click Detach, click yes to confirm.
Click on the “Unused Disk” and click remove. Click yes to confirm.
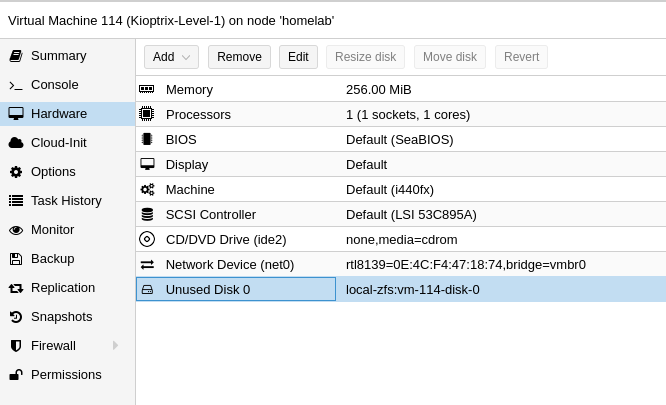
Optionally click on the CD-ROM and remove that too. I did it, but it is not necessary.
Step 3 (Import Disk):
Download Kioptrix. The download link did not work for me, but the mirror did.
Extract the files. I just right clicked and used “extract here”.
Now open a terminal in this directory. If you are using Windows, I would recommend using WSL (you can Shift+right click and choose open Linux Shell Here).
In Linux I just right-click in the folder and choose “Open Terminal Here”.
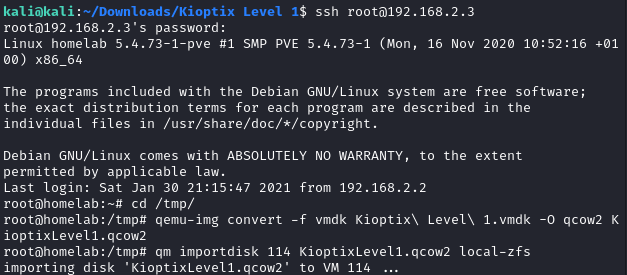
Using secure copy, I will copy the disk over to Proxmox (replace the IP address with that of your Proxmox node:scp Kioptix\ Level\ 1.vmdk [email protected]:/tmp/
Enter the root password of your Proxmox node and press enter. This will copy the disk to the temp folder of your Proxmox node.

Now I will use ssh to connect to my node:ssh [email protected]
Change the directory to /tmpcd /tmp/
Convert the disk to qcow2qemu-img convert -f vmdk Kioptix\ Level\ 1.vmdk -O qcow2 KioptixLevel1.qcow2
Import the disk using the following command, but change the 114 to your VM ID and the local-zfs to your storage pool nameqm importdisk 114 KioptixLevel1.qcow2 local-zfs
When this is done, you can close the ssh session by typing exit. The /tmp folder will be wiped at shutdown/reboot or you can manually remove the files now if you want.
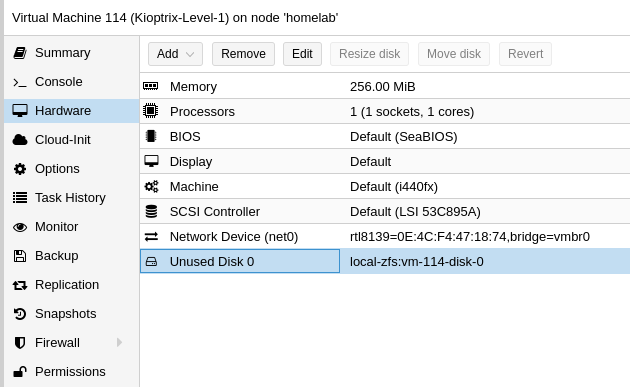
Open the Proxmox web interface again. You may need to navigate away from your Kioptrix VM and back in order to see the newly added disk, which will show as “Unused Disk 0”.
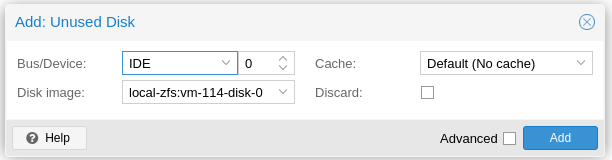
Double-click the disk, confirm that the settings are as below and click on “Add”.
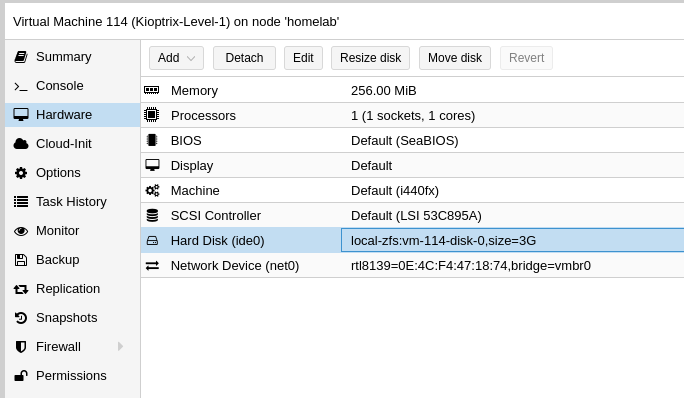
The disk will now show as “Hard Disk (ide0)
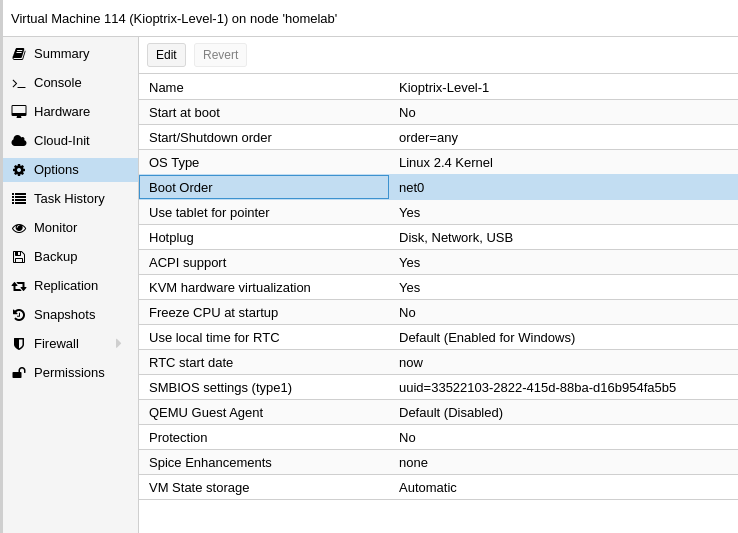
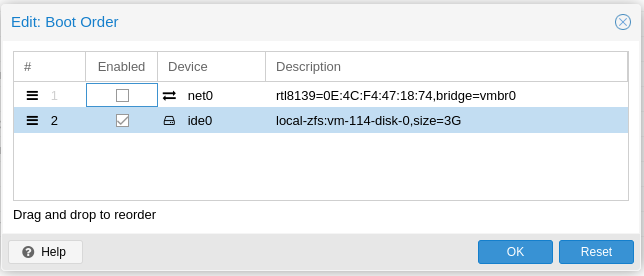
Click on options and double-click on “Boot Order”.
Untick net0 (and also the cd-rom if not removed) and only tick the hard disk. Click on OK.
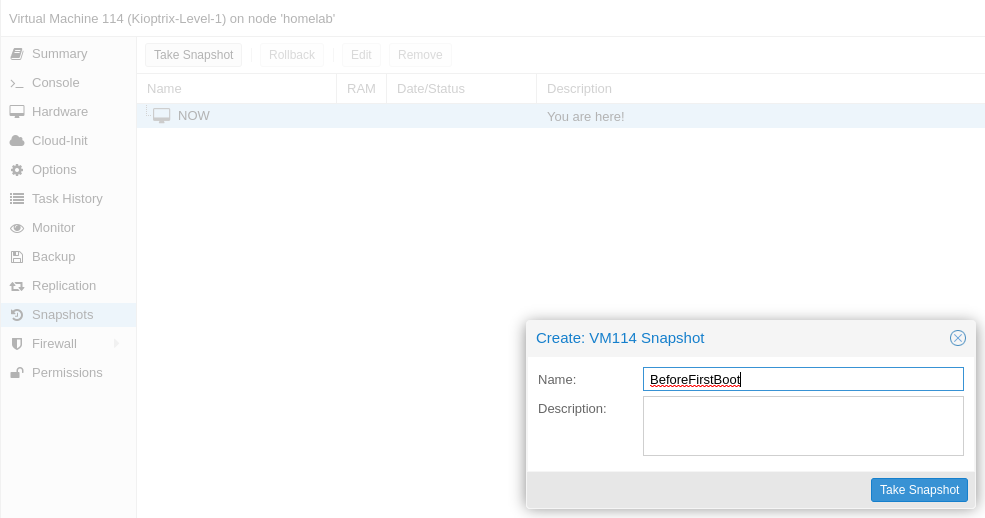
This is optional, but I would highly recommend taking a snapshot before booting.
Navigate to Snapshots and click on Take Snapshop. Type a descriptive name and click on Take Snapshot on the dialog box.
Step 4 (Change Network Config on the VM):
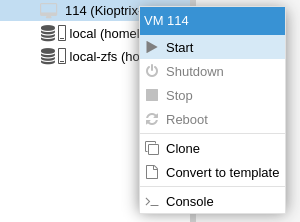
Now right click on the VM and click on start. Wait a few moments for the machine to start and then double-click on the machine to open a noVNC session.
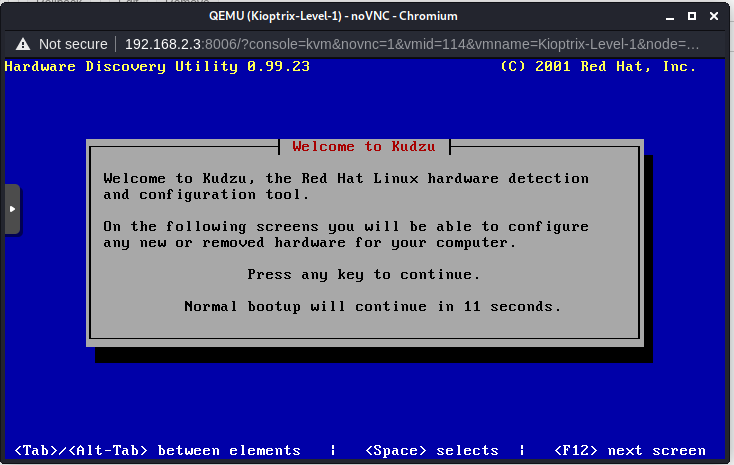
This is important. Before the timer runs out, tap on any key so that you can configure the changed network card. If you missed this window, you have to stop the VM and start it again in order to get to this step.
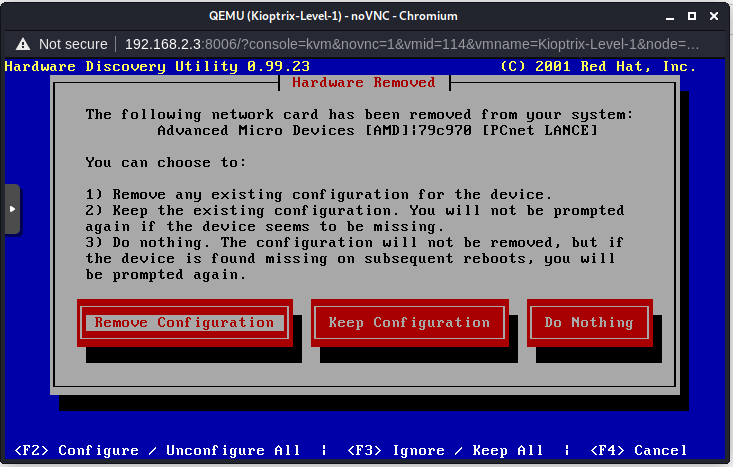
Ensure that “Remove Configuration” is selected and press enter.
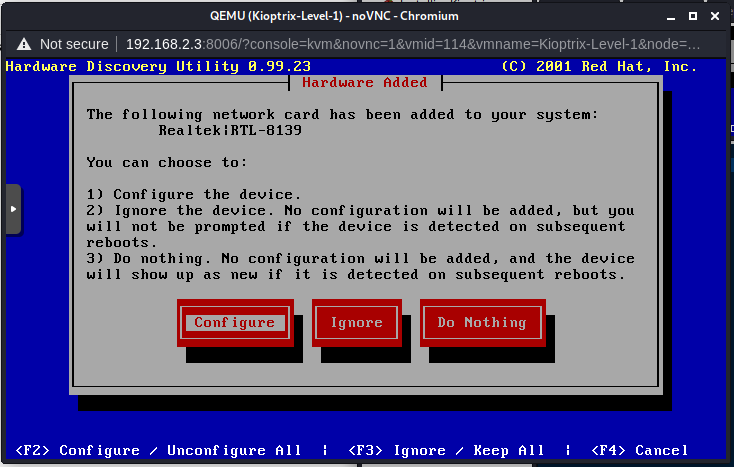
On the next window, choose Configure.
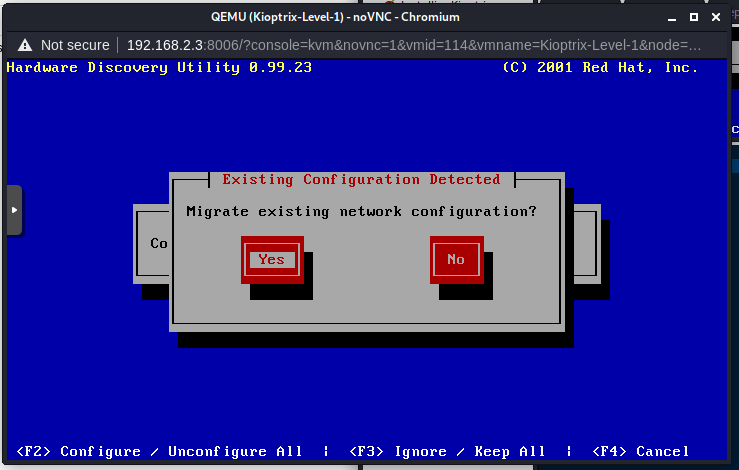
Migrate the existing network configuration by selecting “Yes” and press enter.
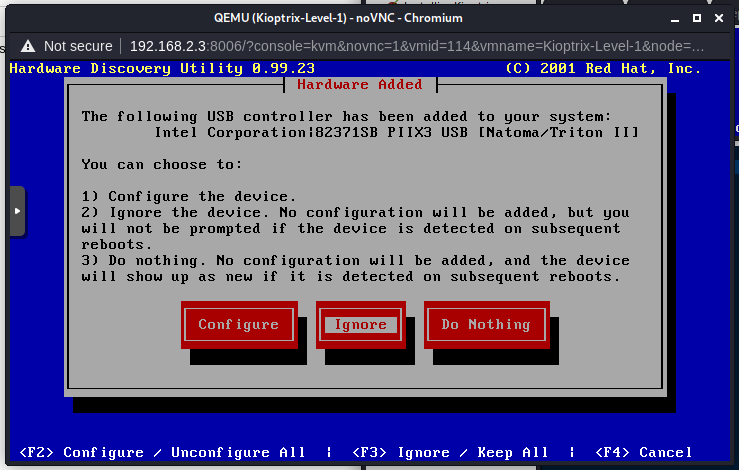
For the USB configuration, you can choose “Ignore” and press enter.
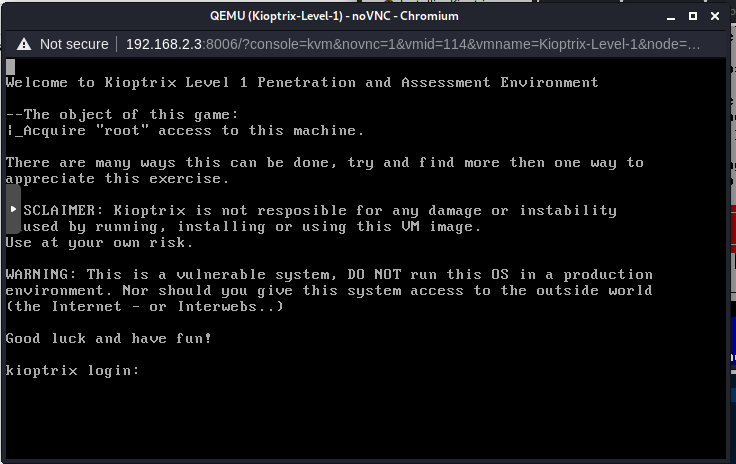
Kioptrix will now continue to boot and show you the welcome screen.
Step 5 (Scan for the Machine):
From any other machine on the network (Most likely your attacking machine) run the following command to scan for machines. This command must be run as root.arp-scan -l
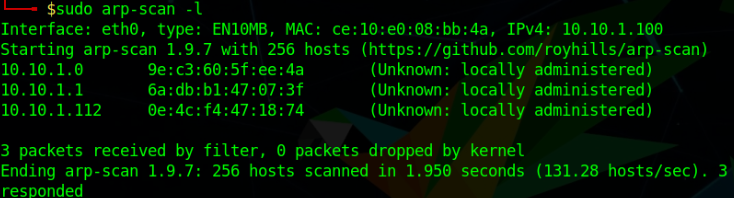
On mine, my new Kioptrix machine received the IP address of 10.10.1.112
Have fun!